


현재 오라클 DB버전 목록들은
11g 11.2.0.4 지원종료 2020년 12월 31일
12c release 1 12.1.0.1 지원종료 2016년 8월 31일
12c release 2 12.2.0.1 지원종료 2022년 3월 31일
18c 18.5 출시일 2018.2월 현재 상용화 버전
19c 19.3 출시일 2019.2월 현재 상용화 버전
21c 클라이언트만 발표되었기때문에 서버는 없습니다.
Oracle 사에서 지원하는 버전은 12c 12.2버전, 18.5c, 19.3c 입니다.
그렇기 때문에 현재 최신버전인 19.3c 를 설치해봅시다.
설치 환경 CentOS 7(yum update 진행된 상태), CentOS 7.9 release
[root@JH ~]# cat /etc/redhat-release
CentOS Linux release 7.9.2009 (Core)
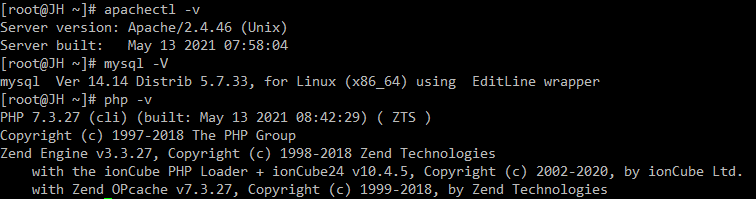
APM 소스설치 환경 버전
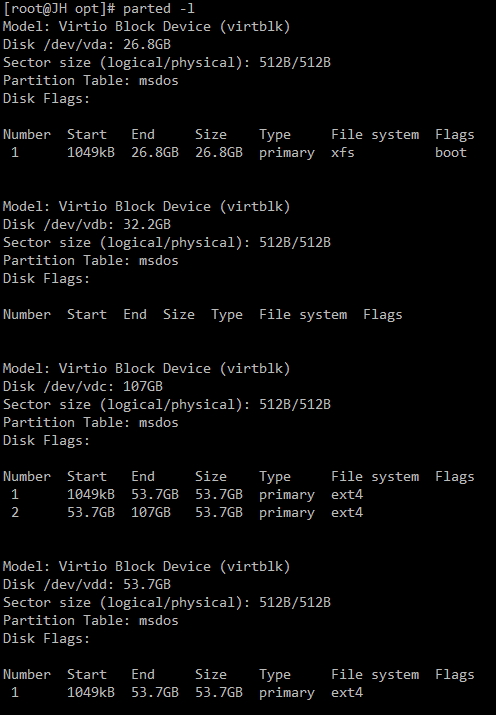
만약 OS 디스크가 용량이 없다면 용량을 대략적으로 30기가정도 있어야합니다. 용량을 파악해주세요
제가 진행하는 서버는 가상서버로 OS 디스크가 25기가이므로 추가디스크들을 붙여서 마운트 했습니다.
일단 스왑디스크, /home 마운트, 오라클 설치할 폴더 /opt, APM설치파일들저장소 /usr/local/src 에 마운트 했습니다.
[root@JH opt]# df -Th
Filesystem Type Size Used Avail Use% Mounted on
/dev/vda1 xfs 25G 9.8G 16G 40% /
/dev/vdc2 ext4 50G 3.0G 44G 7% /home
/dev/vdc1 ext4 50G 6.2G 41G 14% /usr/local/src
/dev/vdd1 ext4 50G 53M 47G 1% /opt
가상서버에서 추가로 붙인 디스크를 스왑디스크로 사용하는 방법입니다.
[root@JH ~]# free -m
total used free shared buff/cache available
Mem: 15884 745 15040 19 97 14914
Swap: 0 0 0
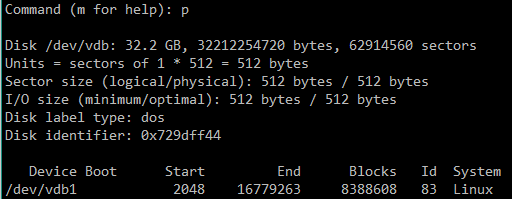
# fdisk /dev/vdb
Command (m for help): n n입력
Partition type:
p primary (0 primary, 0 extended, 4 free)
e extended
Select (default p): p p 선택
Partition number (1-4, default 1): 1입력 또는 엔터누르기
First sector (2048-62914559, default 2048): 2048입력 또는 엔터누르기
Using default value 2048
Last sector, +sectors or +size{K,M,G} (2048-62914559, default 62914559): +8G
Partition 1 of type Linux and of size 8 GiB is set
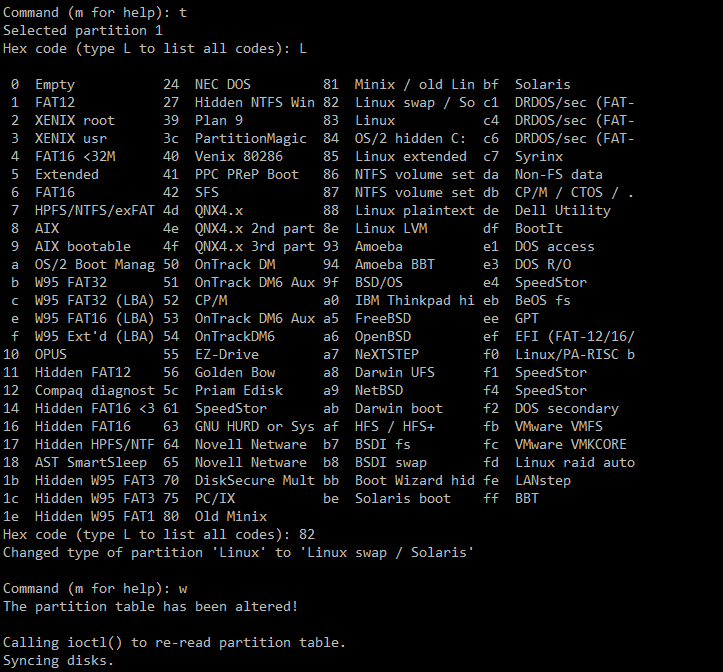
t 입력
L 입력 (리스트 보기)
82 입력 (스왑 영역)
w 입력 (저장하고 나가기)
[root@JH ~]# mkswap /dev/vdb1
mkswap: /dev/vdb1: warning: wiping old swap signature.
Setting up swapspace version 1, size = 8388604 KiB
no label, UUID=c5791477-74bc-4a71-9d74-28b51f4f98da
여기서 UUID 값 확인합니다.
[root@JH ~]# blkid | grep /dev/vdb1 >> /etc/fstab
[root@JH ~]# vi /etc/fstab
====================
#/dev/vdb1
UUID=c5791477-74bc-4a71-9d74-28b51f4f98da swap swap defaults 0 0
====================
[root@JH ~]# swapon -a
[root@JH ~]# swapon -s
Filename Type Size Used Priority
/dev/vdb1 partition 8388604 0 -2
[root@JH ~]# free -m
total used free shared buff/cache available
Mem: 15884 750 15022 27 110 14899
Swap: 8191 0 8191
오라클 설치하기전에 앞서 서버에 설정해야하는 부분이 있습니다.
# vi /etc/hostname
해당파일에 서버의 호스트 이름을 정해줍니다. 저는 JH로 했습니다.
====================
JH
# ifconfig
# curl ifconfig.io
두개 IP가 동일하면 동일한 IP만 넣고 다르다면 둘다 /etc/hosts에 넣어주시면 됩니다.
====================
# vi /etc/hosts
위에 파일에 호스트네임명을 추가해줍니다. JH
====================
127.0.0.1 localhost localhost.localdomain localhost4 localhost4.localdomain4 JH
::1 localhost localhost.localdomain localhost6 localhost6.localdomain6
10.101.0.7 JH
123.123.123.123 JH
====================
오라클 계정 만들어주기
# useradd -g oinstall -G dba oracle
# groupadd -g 54321 oinstall
# groupadd -g 54322 dba
# groupadd -g 54323 oper
# groupadd -g 54324 backupdba
# groupadd -g 54325 dgdba
# groupadd -g 54326 kmdba
# groupadd -g 54327 asmdba
# groupadd -g 54330 racdba
# useradd -u 54321 -g oinstall -G dba,oper,backupdba,dgdba,kmdba,asmdba,racdba oracle
# passwd oracle
# ll /etc/hosts
-rw-r–r– 1 root root 213 May 30 10:49 /etc/hosts
해당파일이 644 권한으로 있어야합니다. 추후에 설치할때 Oracle 계정에서 해당파일을 읽기를 할 수 있어야합니다.
오라클은 데스크탑그래픽환경에서 설치를 해야하며, 그러므로 XWindows를 설치를 해야합니다.
# yum -y groups install “GNOME Desktop” “X Window System”
############## 만약 reboot 시 GUI로 띄우고 싶다면 다음 실행####################
echo “exec gnome-session” >> ~/.xinitrc
ln -sf /lib/systemd/system/runlevel5.target /etc/systemd/system/default.target
그렇지만 이렇게 하면 리부팅을 하게된다면 GUI로 부팅되기때문에 추천드리지는 않습니다.
##################################################################
필요 패키지 및 설치 환경 설치
# yum install -y binutils compat-libcap1 gcc gcc-c++ glibc glibc glibc-devel glibc-devel ksh compat-libstdc++-33 libaio libaio libaio-devel libaio-devel libgcc libgcc libstdc++ libstdc++ libstdc++-devel libstdc++-devel libXi libXi libXtst libXtst make sysstat xorg-x11-apps unzip zip xterm smartmontools net-tools vim tigervnc-server
설정파일 복사합니다.
# cp /lib/systemd/system/vncserver@.service /etc/systemd/system/vncserver@:1.service
설정파일 수정합니다.
# vi /etc/systemd/system/vncserver@:1.service
====================
[Unit]
Description=Remote desktop service (VNC)
After=syslog.target network.target
[Service]
Type=simple
# Clean any existing files in /tmp/.X11-unix environment
ExecStartPre=/bin/sh -c ‘/usr/bin/vncserver -kill %i > /dev/null 2>&1 || :’
ExecStart=/usr/sbin/runuser -l oracle -c “/usr/bin/vncserver %i”
#ExecStart=/usr/bin/vncserver_wrapper <USER> %i
PIDFile=/home/oracle/.vnc/%H%i.pid
ExecStop=/bin/sh -c ‘/usr/bin/vncserver -kill %i > /dev/null 2>&1 || :’
[Install]
WantedBy=multi-user.target
====================
# systemctl daemon-reload
# systemctl start vncserver@:1.service
# vncserver
You will require a password to access your desktops.
Password:
Verify:
Would you like to enter a view-only password (y/n)? y
Password:
Verify:
xauth: file /root/.Xauthority does not exist
New ‘JH:1 (root)’ desktop is JH:1
Creating default startup script /root/.vnc/xstartup
Creating default config /root/.vnc/config
Starting applications specified in /root/.vnc/xstartup
Log file is /root/.vnc/JH:1.log
VNC 접속을 위한 방화벽 설정합니다.
# vi /etc/sysconfig/iptables
====================
*filter
:INPUT ACCEPT [0:0]
:FORWARD ACCEPT [0:0]
:OUTPUT ACCEPT [0:0]
:RH-Firewall-1-INPUT – [0:0]
-A INPUT -j RH-Firewall-1-INPUT
-A FORWARD -j RH-Firewall-1-INPUT
-A RH-Firewall-1-INPUT -p tcp -m state –state NEW -m tcp –dport 5901 -j ACCEPT
-A RH-Firewall-1-INPUT -p tcp -m state –state NEW -m tcp –dport 6001 -j ACCEPT
====================
# systemctl restart iptables
VNC 리스트 확인합니다.
[root@JH ~]# vncserver -list
TigerVNC server sessions:
X DISPLAY # PROCESS ID
:1 23706
Oracle 설정값 서버에 설정합니다.
# vi /etc/sysctl.conf
====================
fs.aio-max-nr = 1048576
fs.file-max = 6815744
kernel.sem = 250 32000 100 128
kernel.shmmni = 4096
kernel.shmall = 1073741824
kernel..shmmax = 4398046511104
kernel.panic_on_oops = 1
net.core.rmem_default = 262144
net.core.rmem_max = 4194304
net.core.wmem_default = 262144
net.core.wmem_max = 1048576
net.ipv4.conf.all.rp_filter = 2
net.ipv4.conf.default.rp_filter = 2
net.ipv4.ip_local_port_range = 9000 65500
====================
커널 변경값 적용 및 확인합니다.
# sysctl -p
# mkdir /etc/limit.d
# vi /etc/limit.d/oracle-database-preinstall-19c.conf
====================
# oracle-database-preinstall-19c setting for nofile soft limit is 1024
oracle soft nofile 1024
# oracle-database-preinstall-19c setting for nofile hard limit is 65536
oracle hard nofile 65536
# oracle-database-preinstall-19c setting for nproc soft limit is 16384
# refer orabug15971421 for more info.
oracle soft nproc 16384
# oracle-database-preinstall-19c setting for nproc hard limit is 16384
oracle hard nproc 16384
# oracle-database-preinstall-19c setting for stack soft limit is 10240KB
oracle soft stack 10240
# oracle-database-preinstall-19c setting for stack hard limit is 32768KB
oracle hard stack 32768
# oracle-database-preinstall-19c setting for memlock hard limit is maximum of 128GB on x86_64 or 3GB on x86 OR 90 % of RAM
oracle hard memlock 134217728
# oracle-database-preinstall-19c setting for memlock soft limit is maximum of 128GB on x86_64 or 3GB on x86 OR 90% of RAM
oracle soft memlock 134217728
# oracle-database-preinstall-19c setting for data soft limit is ‘unlimited’
oracle soft data unlimited
# oracle-database-preinstall-19c setting for data hard limit is ‘unlimited’
oracle hard data unlimited
====================
CentOS 8 버전일 경우, 아래 명령어를 이용하여 설정값 및 필요 패키지를 자동으로 설치,설정 할수 있습니다.
# yum install -y dnf
# dnf install -y https://yum.oracle.com/repo/OracleLinux/OL8/baseos/latest/x86_64/getPackage/oracle-database-preinstall-19c-1.0-1.el8.x86_64.rpm
시스템 환경변수설정, 오라클 베이스 및 인벤토리 디렉토리 생성
# vi /home/oracle/.bash_profile
# vi /etc/profile
# vi ~/.bash_profile
===============================
export ORACLE_BASE=/opt/oracle
export ORACLE_HOME=$ORACLE_BASE/product/19.3/dbhome_1
export ORACLE_SID=ORCL
export PATH=$ORACLE_HOME/bin:$PATH
export ORACLE_HOME_LISTNER=$ORACLE_HOME/bin/lsnrctl
export LD_LIBRARY_PATH=$ORACLE_HOME/lib:/lib:/usr/lib
PATH=$PATH:$HOME/.local/bin:$HOME/bin
===============================
# source /etc/profile
# source /home/oracle/.bash_profile
# source ~/.bash_profile
# mkdir -p /opt/oracle/product/19.3/dbhome_1 => 소프트웨어 디렉토리 생성합니다. (ORACLE_HOME)
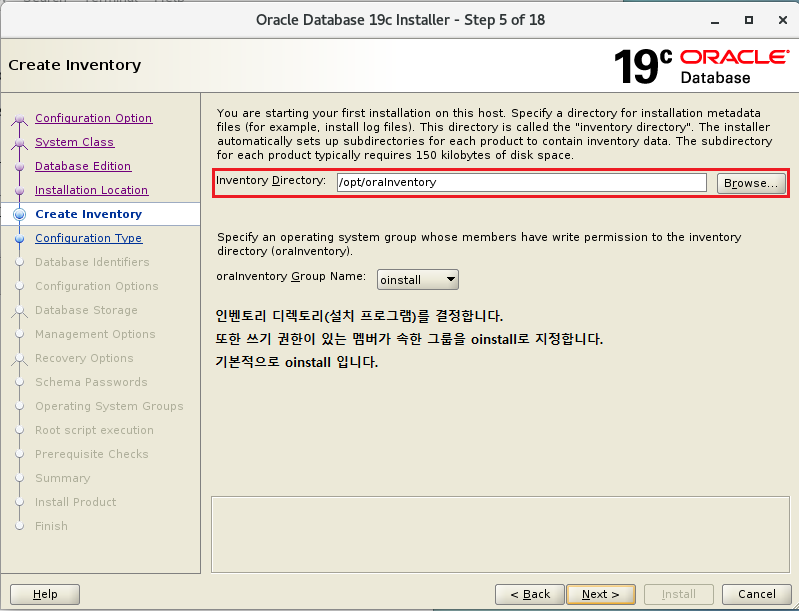
# mkdir -p /opt/oraInventory => 인벤토리 디렉토리 생성합니다. (설치 로그 저장 디렉토리)
Oracle Database 다운
https://edelivery.oracle.com/osdc/faces/SoftwareDelivery 여기 사이트에서 오라클로그인해서 찾아서 다운로드하시면 됩니다.
저는 제 컴퓨터에 다운로드해서 서버 FTP로 업로드했습니다.
# mv 파일받은거 이름 Oracle_Database_19.3.0.0.0_for_Linux_x86_64.zip 로 변경합니다.
# cp -arp Oracle_Database_19.3.0.0.0_for_Linux_x86_64.zip /opt/oracle/product/19.3/dbhome_1/
# cd /opt/oracle/product/19.3/dbhome_1/
# unzip Oracle_Database_19.3.0.0.0_for_Linux_x86_64.zip
# chown -R oracle:oinstall /opt/oracle/
# chown -R oracle:oinstall /opt/oraInventory/
# netstat -ntlp
Active Internet connections (only servers)
Proto Recv-Q Send-Q Local Address Foreign Address State PID/Program name
tcp 0 0 0.0.0.0:6001 0.0.0.0:* LISTEN 23706/Xvnc
tcp 0 0 0.0.0.0:21 0.0.0.0:* LISTEN 27356/vsftpd
tcp 0 0 0.0.0.0:22 0.0.0.0:* LISTEN 20662/sshd
tcp 0 0 127.0.0.1:25 0.0.0.0:* LISTEN 1102/master
tcp 0 0 0.0.0.0:3306 0.0.0.0:* LISTEN 1924/mysqld
tcp 0 0 0.0.0.0:5901 0.0.0.0:* LISTEN 23706/Xvnc
tcp6 0 0 :::80 :::* LISTEN 2059/httpd
tcp6 0 0 :::6001 :::* LISTEN 23706/Xvnc
tcp6 0 0 :::22 :::* LISTEN 20662/sshd
tcp6 0 0 ::1:25 :::* LISTEN 1102/master
tcp6 0 0 :::5901 :::* LISTEN 23706/Xvnc
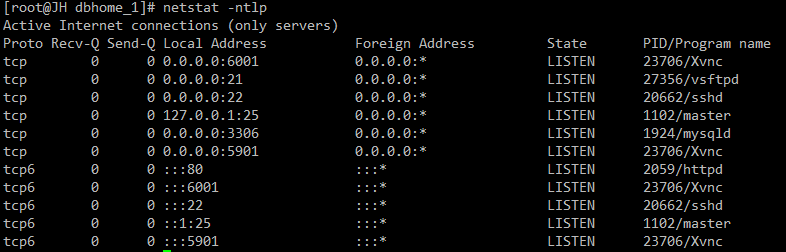
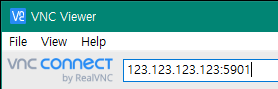
현재 컴퓨터에서 VNC Viewer를 설치하여 실행하여 접속합니다. 5901포트로 VNC 접속합니다.
# vncserver
You will require a password to access your desktops.
Password:
Verify:
Would you like to enter a view-only password (y/n)? y
Password:
Verify:
xauth: file /root/.Xauthority does not exist
New ‘JH:1 (root)’ desktop is JH:1
Creating default startup script /root/.vnc/xstartup
Creating default config /root/.vnc/config
Starting applications specified in /root/.vnc/xstartup
Log file is /root/.vnc/JH:1.log
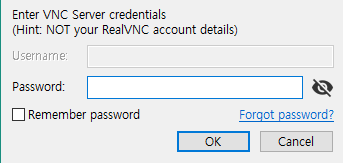
여기서 입력했던 비밀번호 입력합니다.
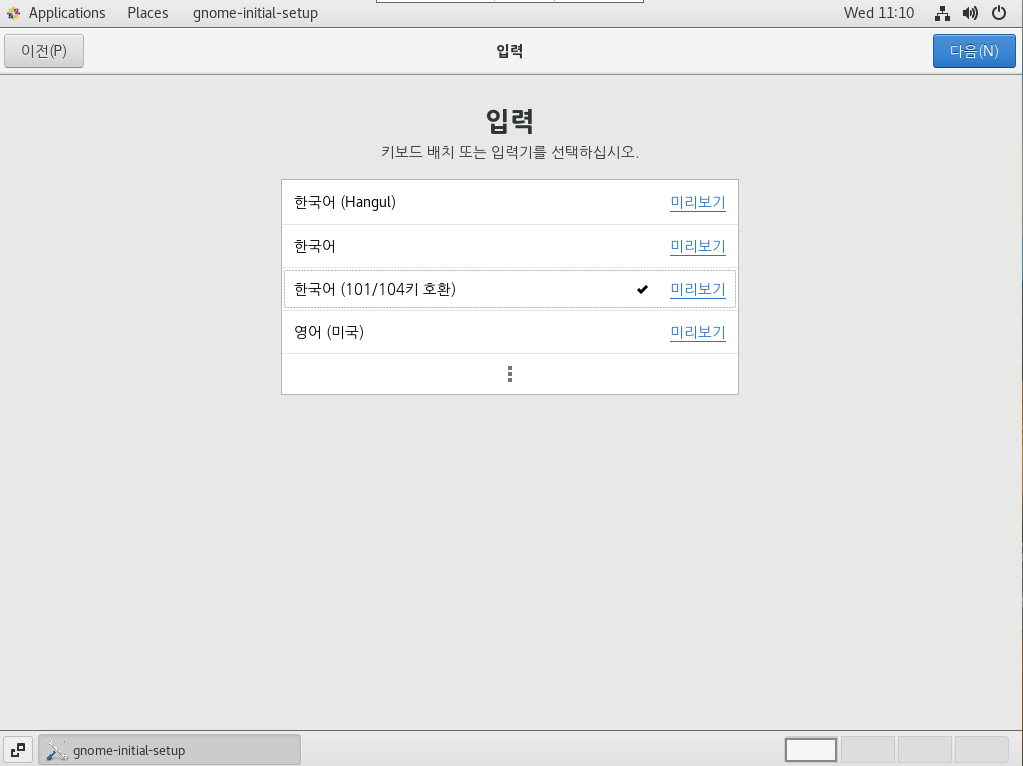
처음 실행하면 아래와 같은 화면이 나옵니다. 한국어를 누르고
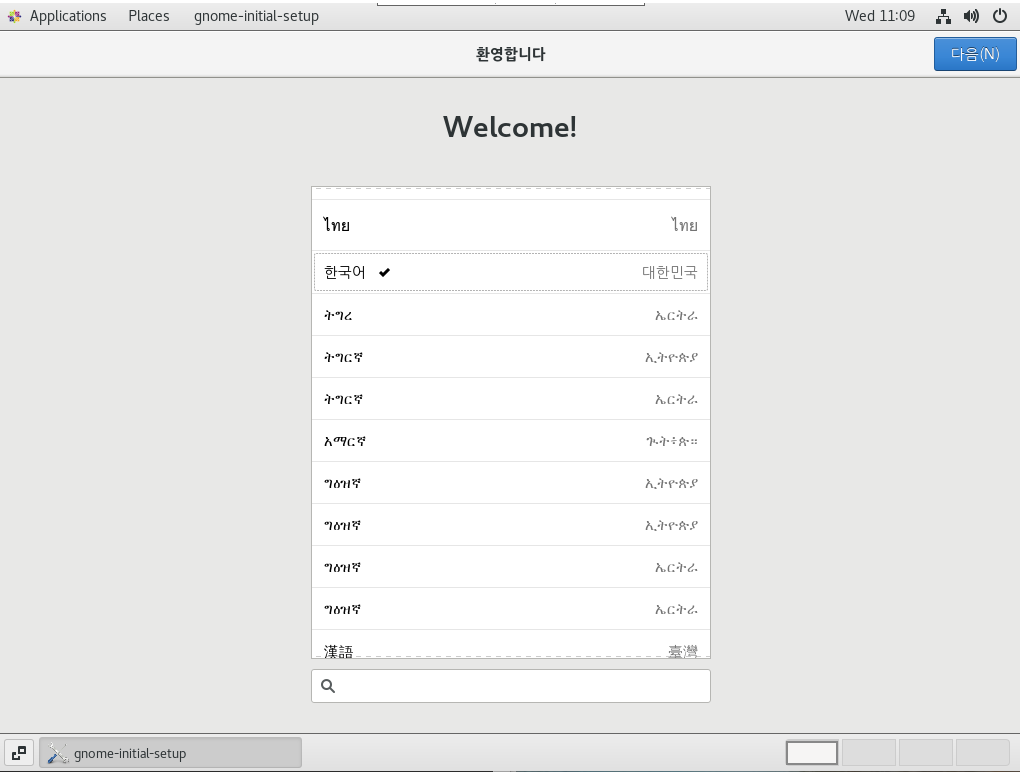
한국인이고 기본 키보드를 쓰신다면 한국어 (101/104키 호환)을 선택하고 다음을 누릅니다.
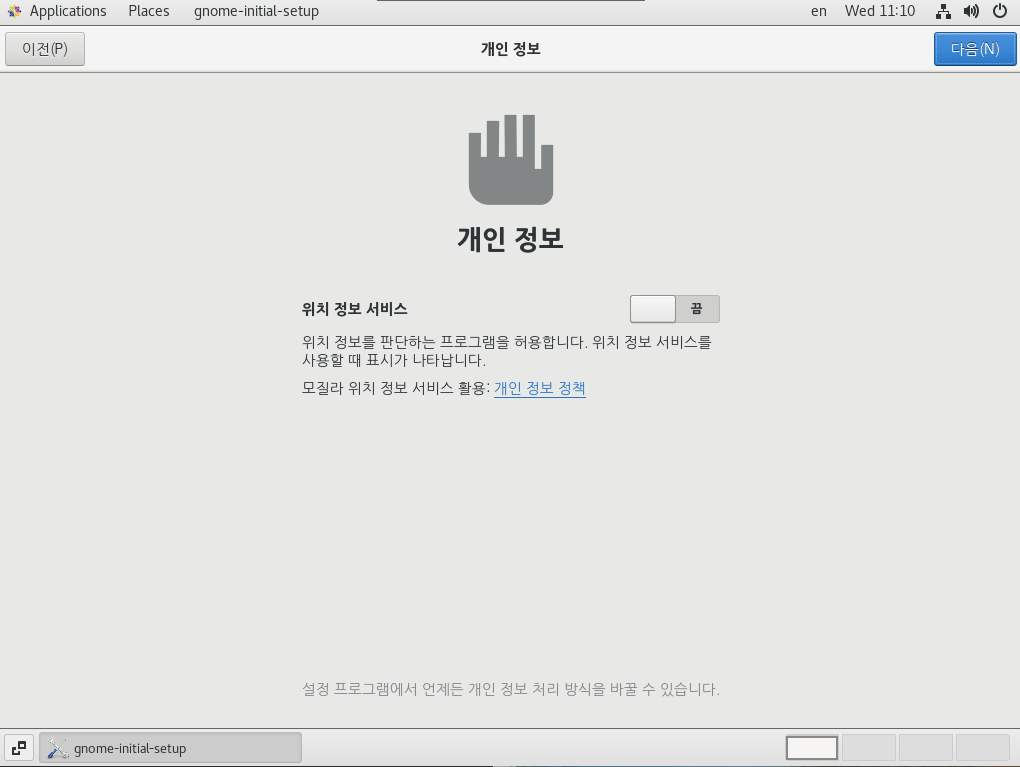
위치 정보는 끄고 다음을 누릅니다
CentOS Linux 시작을 클릭합니다.
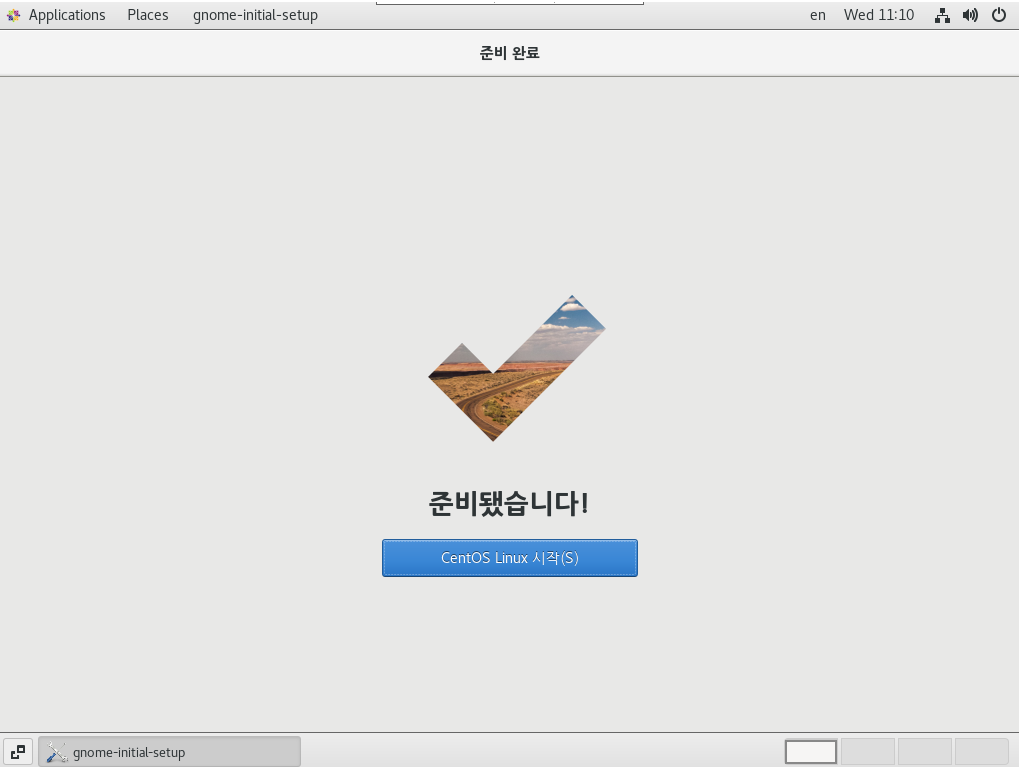
위에 화면에서 클릭하면 아래와 같은 화면이 나오는데 오른쪽마우스를 클릭하여 Open Terminal 을 클릭하여 실행합니다.

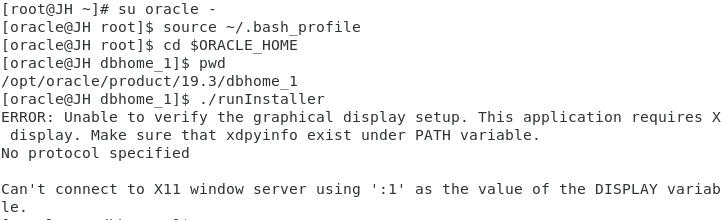
[root@JH ~]# su oracle –
[oracle@JH root]$ source ~/.bash_profile
[oracle@JH dbhome_1]$ cd $ORACLE_HOME
[oracle@JH dbhome_1]$ pwd
/opt/oracle/product/19.3/dbhome_1
# ./runInstaller 하면 아래와 같은 오류가 나옵니다.
새로운 터미널을 띄운다 root 접속합니다.
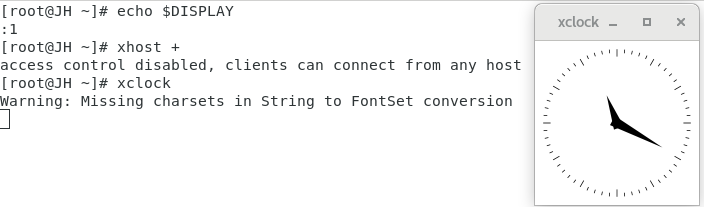
[root@JH ~]# xhost +
access control disabled, clients can connect from any host ->>나와도 상관없습니다.
[root@JH ~]# xclock (이러면 시계가 뜹니다. x를 눌러 닫는다. 또는 ctrl+c 입력)
[root@JH ~]# xterm
xterm: cannot load font ‘-misc-fixed-medium-r-semicondensed–13-120-75-75-c-60-iso10646-1’
xterm 명령어를 입력하면 새로운 터미널이 나타납니다.

새로운 xterm 터미널에서 입력합니다.
[root@JH ~]# xclock 입력
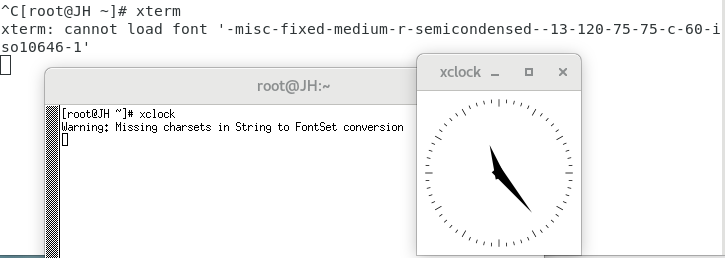
xterm에서 아래와 같은 명령어를 입력합니다.
[root@JH ~]# export DISPLAY=:1
[root@JH ~]# echo $DISPLAY
:1
![]()
그리고 다시 oracle로 로그인되어있는 터미널에서 해당 명령어를 실행하면 똑같이 오류가 나옵니다.(아마 공백때문에 안되는 것입니다.) 그래서 export DISPLAY=:1 를 입력하고 ./runInstaller을 입력하면 실행됩니다.
[oracle@JH dbhome_1]$ export DISPLAY=:1
[oracle@JH dbhome_1]$ ./runInstaller
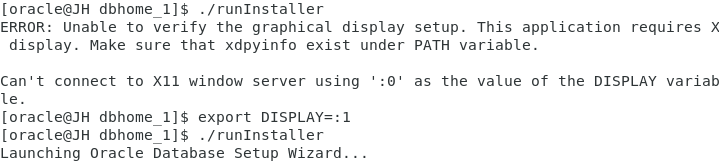
절때로 해당 실행한 터미널은 건들지마세요
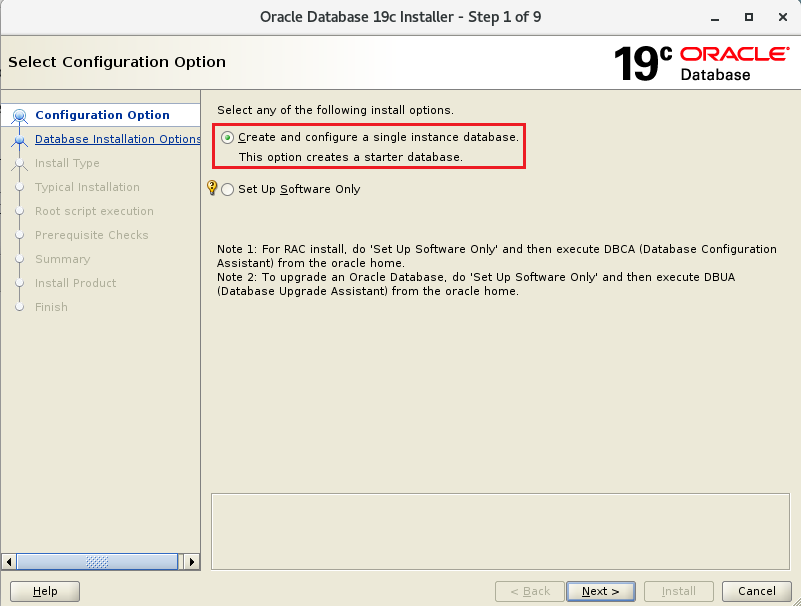
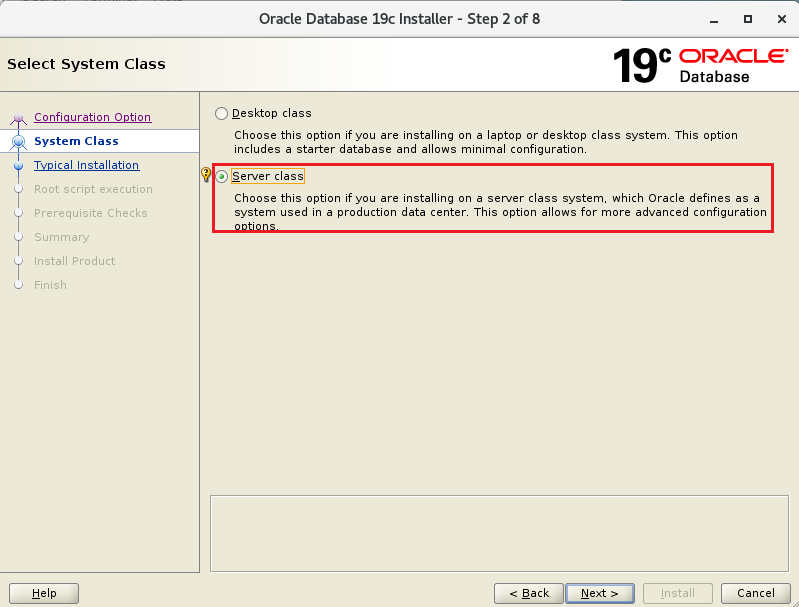
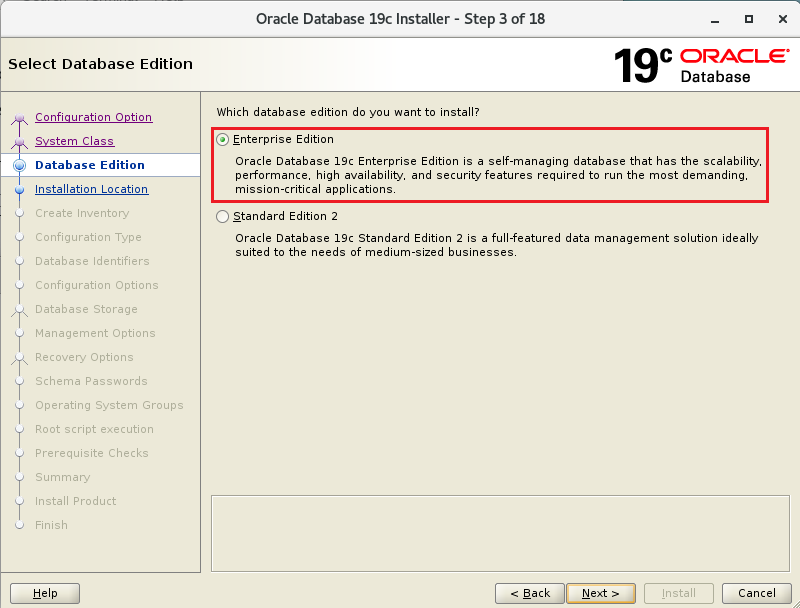
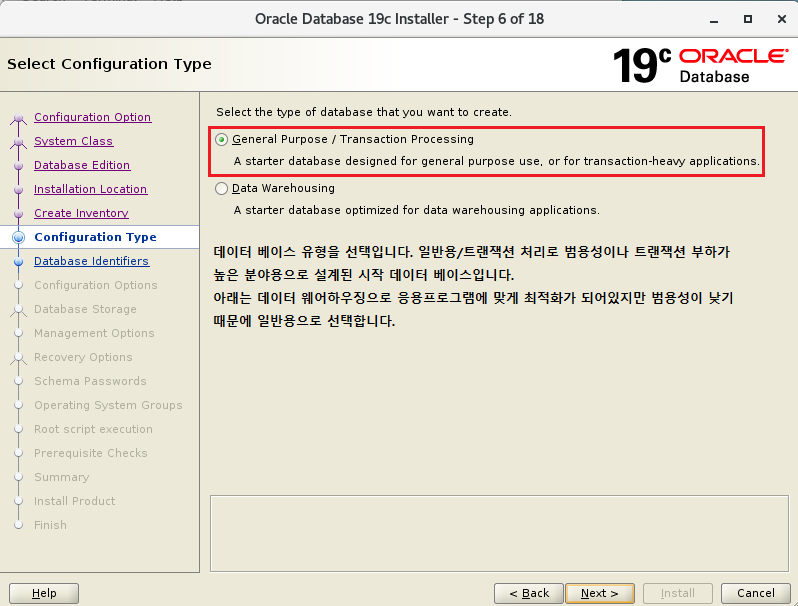
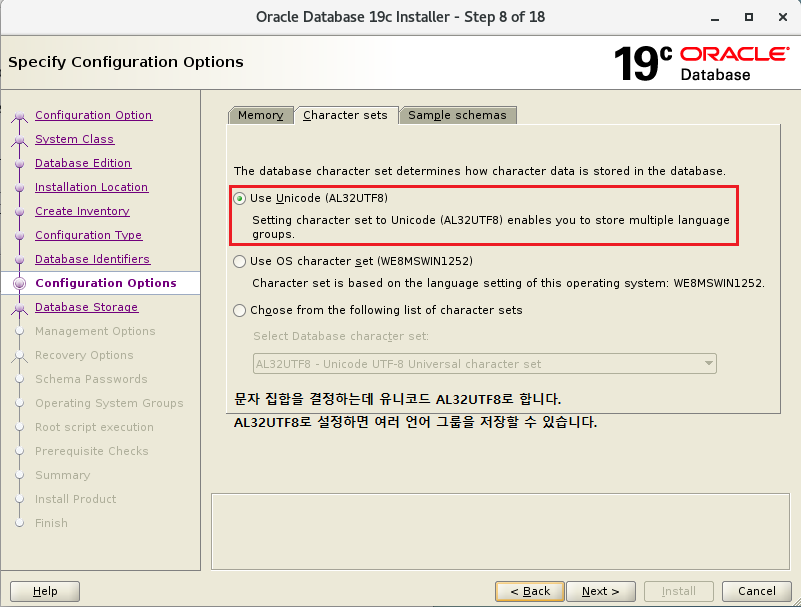
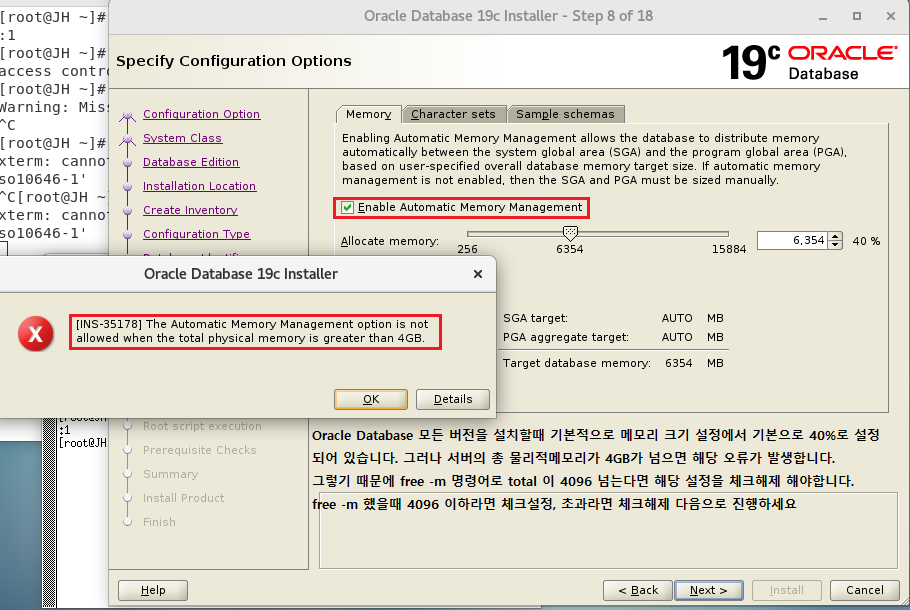
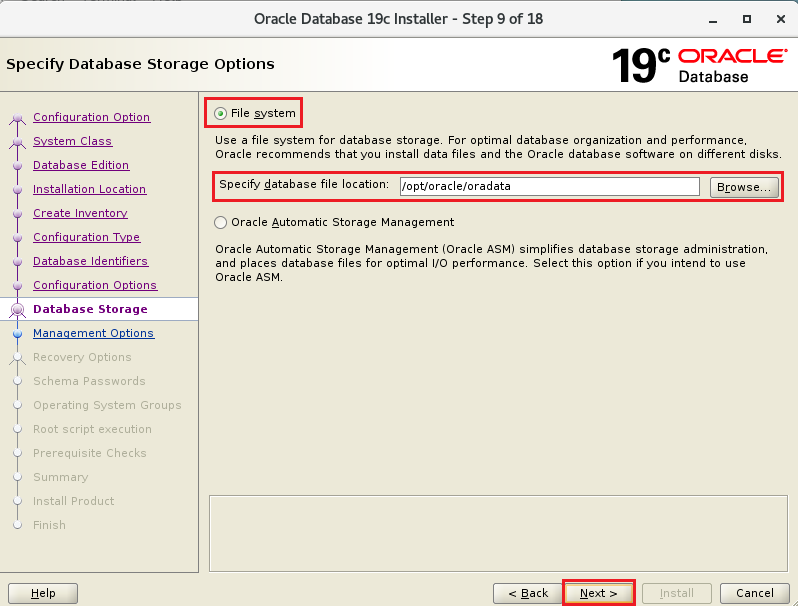
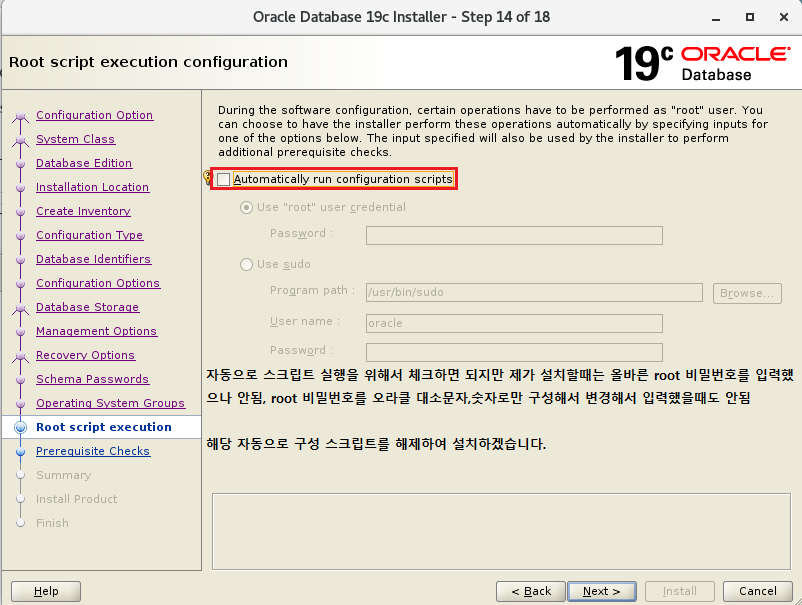
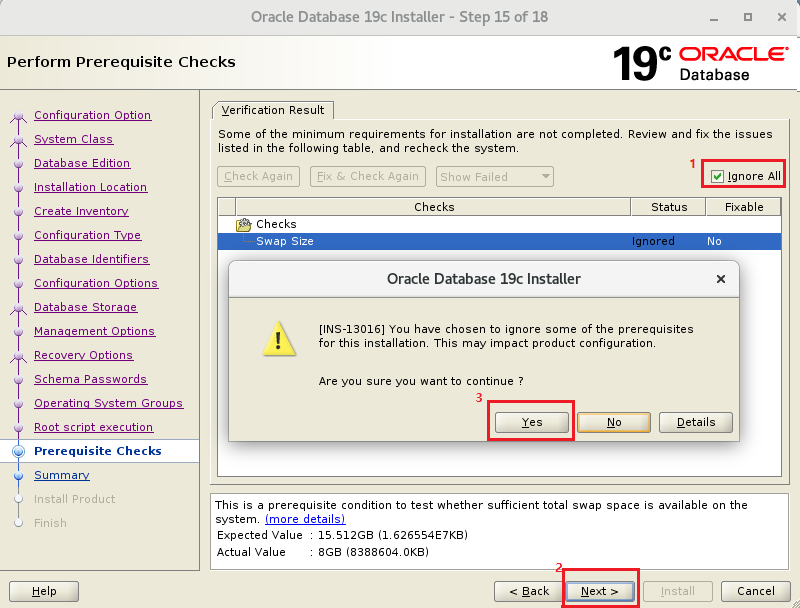
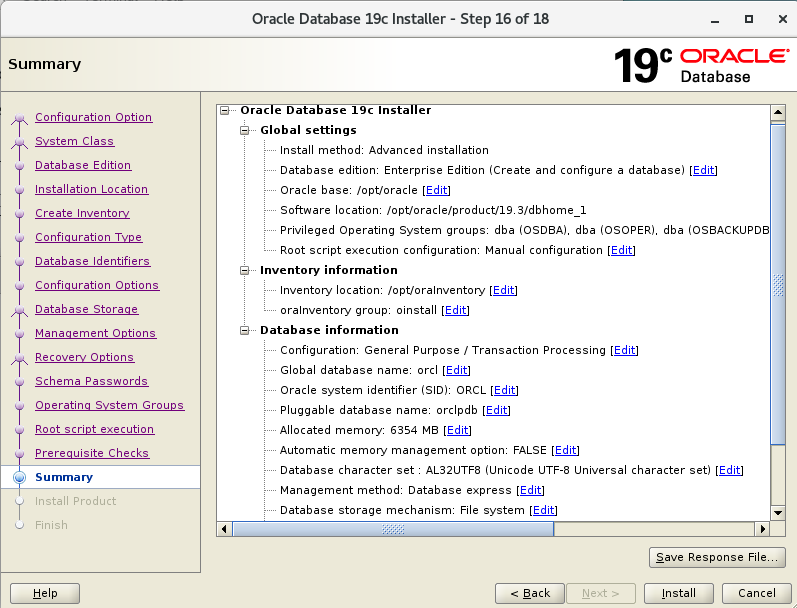
아래부터는 그림으로 설명하겠습니다.


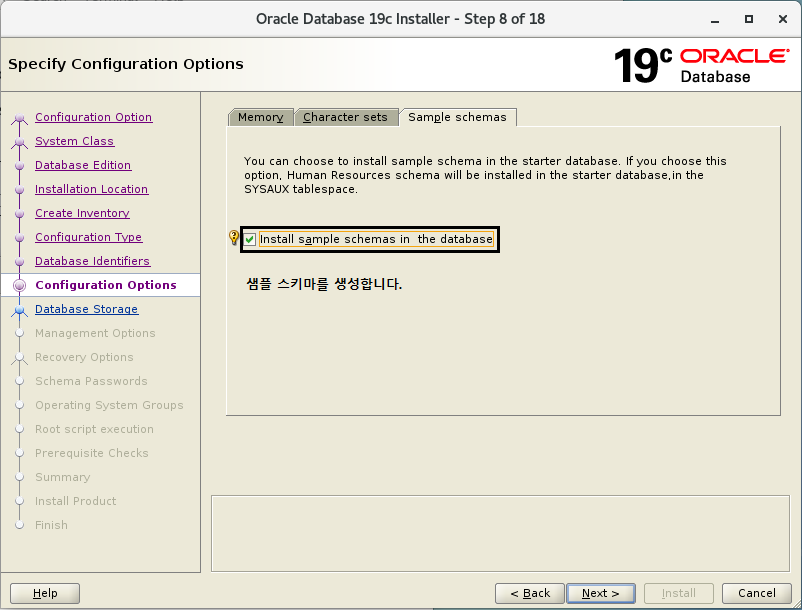
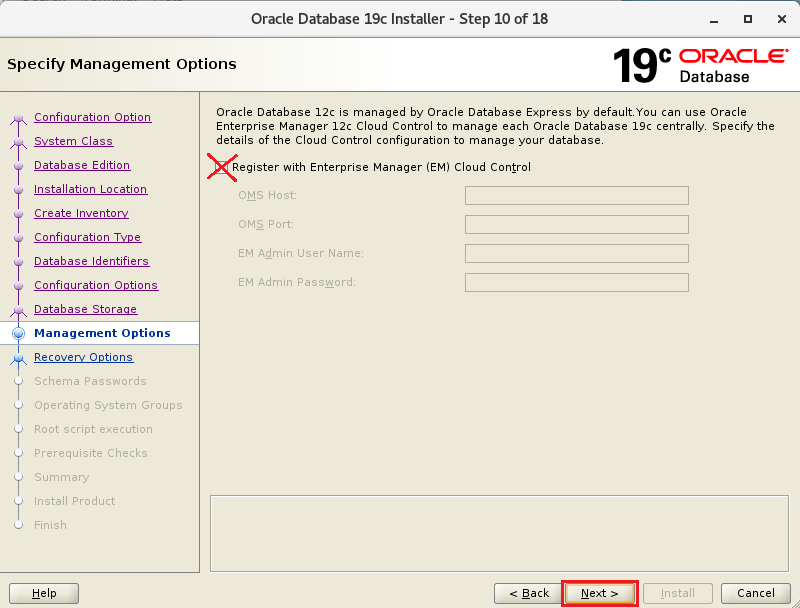
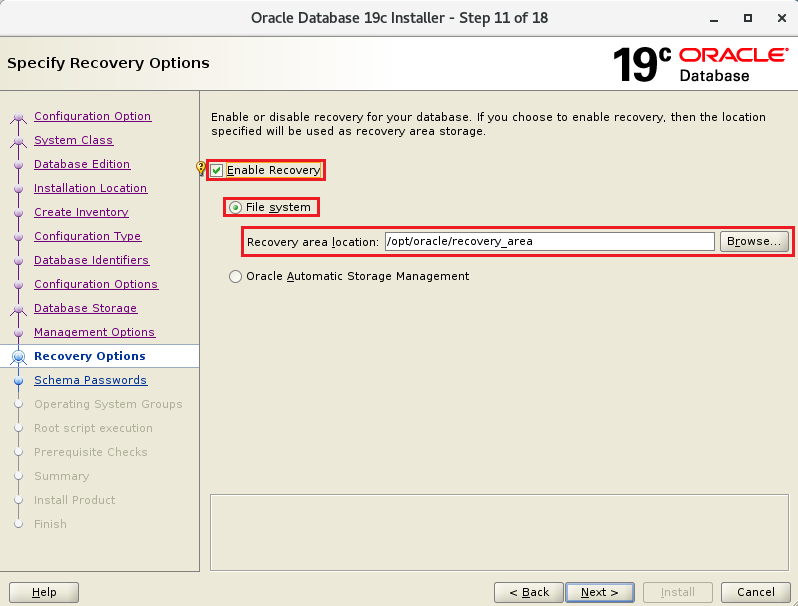
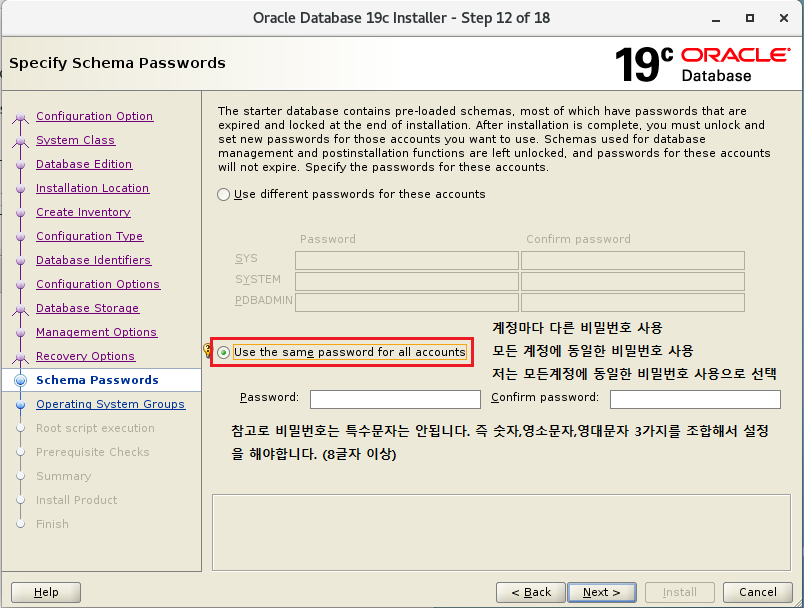
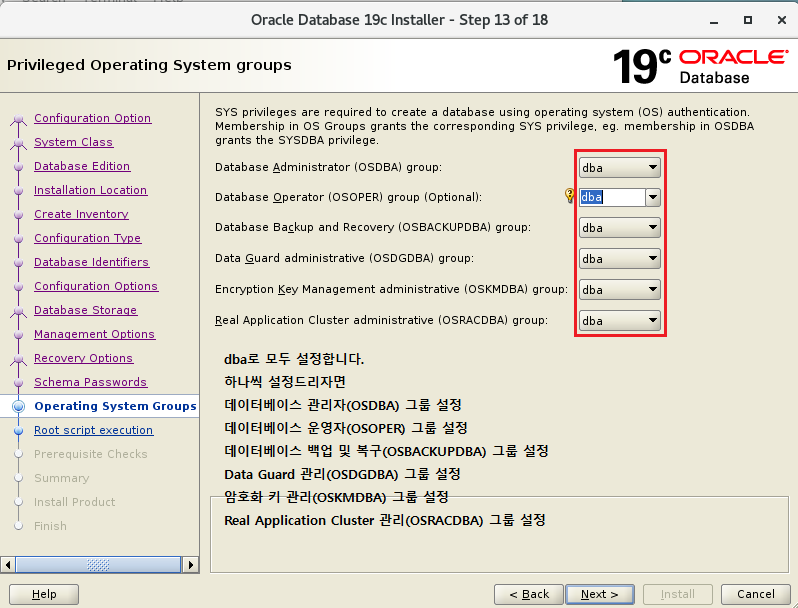

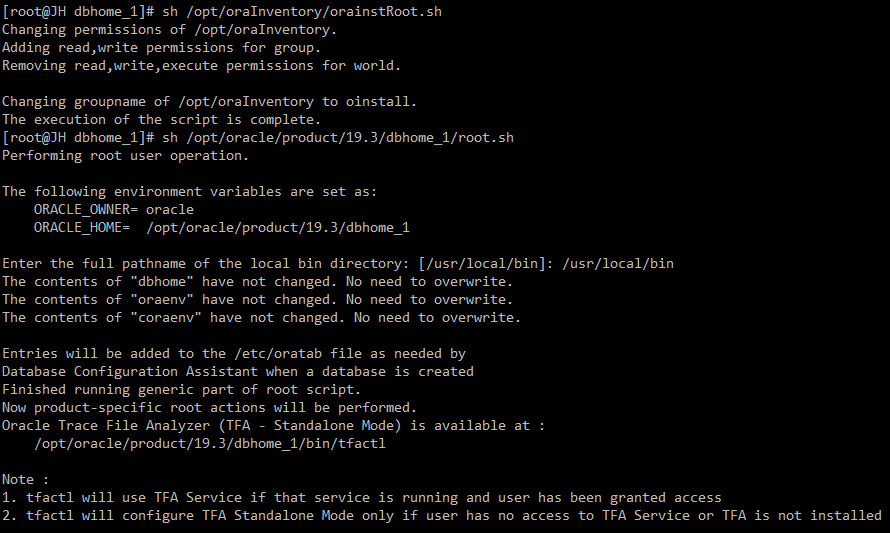
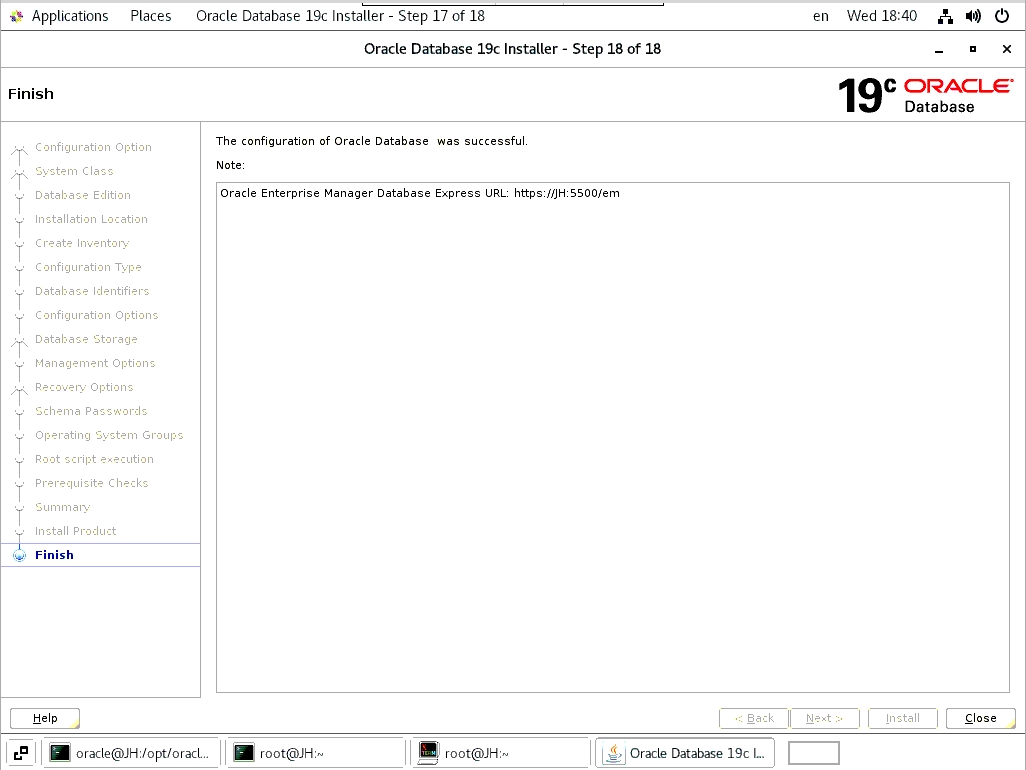
설치 완료되었습니다.
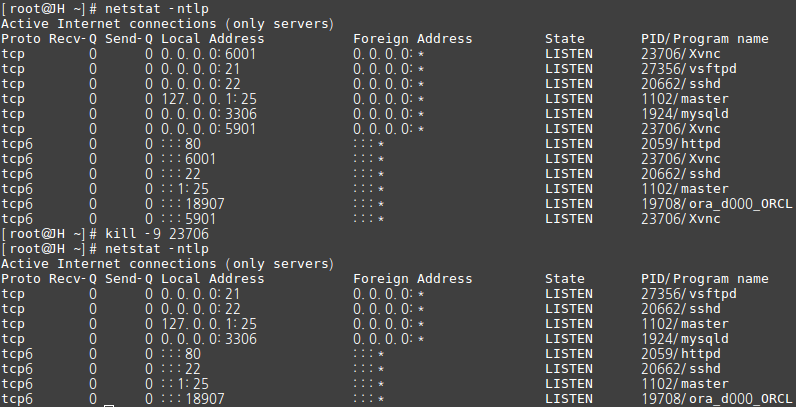
cui 터미널을 실행하여 접속합니다. 이후 VNC를 종료시킵니다.
[root@JH ~]# netstat -ntlp
Active Internet connections (only servers)
Proto Recv-Q Send-Q Local Address Foreign Address State PID/Program name
tcp 0 0 0.0.0.0:6001 0.0.0.0:* LISTEN 23706/Xvnc
tcp 0 0 0.0.0.0:21 0.0.0.0:* LISTEN 27356/vsftpd
tcp 0 0 0.0.0.0:22 0.0.0.0:* LISTEN 20662/sshd
tcp 0 0 127.0.0.1:25 0.0.0.0:* LISTEN 1102/master
tcp 0 0 0.0.0.0:3306 0.0.0.0:* LISTEN 1924/mysqld
tcp 0 0 0.0.0.0:5901 0.0.0.0:* LISTEN 23706/Xvnc
tcp6 0 0 :::80 :::* LISTEN 2059/httpd
tcp6 0 0 :::6001 :::* LISTEN 23706/Xvnc
tcp6 0 0 :::22 :::* LISTEN 20662/sshd
tcp6 0 0 ::1:25 :::* LISTEN 1102/master
tcp6 0 0 :::18907 :::* LISTEN 19708/ora_d000_ORCL
tcp6 0 0 :::5901 :::* LISTEN 23706/Xvnc
[root@JH ~]# kill -9 23706 터미널 PID 강제종료 보안상 VNC로 누군가 접속할 수 있기때문에 종료를 해줍니다.
[root@JH ~]# netstat -ntlp
Active Internet connections (only servers)
Proto Recv-Q Send-Q Local Address Foreign Address State PID/Program name
tcp 0 0 0.0.0.0:21 0.0.0.0:* LISTEN 27356/vsftpd
tcp 0 0 0.0.0.0:22 0.0.0.0:* LISTEN 20662/sshd
tcp 0 0 127.0.0.1:25 0.0.0.0:* LISTEN 1102/master
tcp 0 0 0.0.0.0:3306 0.0.0.0:* LISTEN 1924/mysqld
tcp6 0 0 :::80 :::* LISTEN 2059/httpd
tcp6 0 0 :::22 :::* LISTEN 20662/sshd
tcp6 0 0 ::1:25 :::* LISTEN 1102/master
tcp6 0 0 :::18907 :::* LISTEN 19708/ora_d000_ORCL
오라클 설치 후 접속방법
[root@JH ~]# su – oracle
Last login: Wed Jun 16 18:46:37 KST 2021 on pts/0
[oracle@JH ~]$ cd $ORACLE_HOME/bin
[oracle@JH bin]$ ./sqlplus / as sysdba
SQL*Plus: Release 19.0.0.0.0 – Production on Wed Jun 16 18:47:36 2021
Version 19.3.0.0.0
Copyright (c) 1982, 2019, Oracle. All rights reserved.
Connected to:
Oracle Database 19c Enterprise Edition Release 19.0.0.0.0 – Production
Version 19.3.0.0.0
SQL>
오라클 인스턴스, 오라클 리스너 실행 및 재시작
[root@JH ~]# su – oracle
Last login: Wed Jun 16 18:46:37 KST 2021 on pts/0
[oracle@JH ~]$ cd $ORACLE_HOME/bin
[oracle@JH bin]$ ./sqlplus / as sysdba
SQL> startup 오라클 인스턴스 실행시작 명령어
ORA-01081: cannot start already-running ORACLE – shut it down first 이미 실행되어있기때문에 해당 오류가 발생
SQL> shutdown immediate 오라클 인스턴스 실행종료 명령어
Database closed.
Database dismounted.
ORACLE instance shut down.
SQL> startup
ORACLE instance started.
Total System Global Area 4999609728 bytes
Fixed Size 9145728 bytes
Variable Size 973078528 bytes
Database Buffers 4009754624 bytes
Redo Buffers 7630848 bytes
Database mounted.
Database opened.
오라클 인스턴스 시작전 데몬 상태
# netstat -ntlp
Active Internet connections (only servers)
Proto Recv-Q Send-Q Local Address Foreign Address State PID/Program name
tcp 0 0 0.0.0.0:21 0.0.0.0:* LISTEN 27356/vsftpd
tcp 0 0 0.0.0.0:22 0.0.0.0:* LISTEN 20662/sshd
tcp 0 0 127.0.0.1:25 0.0.0.0:* LISTEN 1102/master
tcp 0 0 0.0.0.0:3306 0.0.0.0:* LISTEN 1924/mysqld
tcp6 0 0 :::80 :::* LISTEN 2059/httpd
tcp6 0 0 :::22 :::* LISTEN 20662/sshd
tcp6 0 0 ::1:25 :::* LISTEN 1102/master
오라클 인스턴스 시작 후 데몬 상태
# netstat -ntlp
Active Internet connections (only servers)
Proto Recv-Q Send-Q Local Address Foreign Address State PID/Program name
tcp 0 0 0.0.0.0:21 0.0.0.0:* LISTEN 27356/vsftpd
tcp 0 0 0.0.0.0:22 0.0.0.0:* LISTEN 20662/sshd
tcp 0 0 127.0.0.1:25 0.0.0.0:* LISTEN 1102/master
tcp 0 0 0.0.0.0:3306 0.0.0.0:* LISTEN 1924/mysqld
tcp6 0 0 :::80 :::* LISTEN 2059/httpd
tcp6 0 0 :::13777 :::* LISTEN 32240/ora_d000_ORCL
tcp6 0 0 :::22 :::* LISTEN 20662/sshd
tcp6 0 0 ::1:25 :::* LISTEN 1102/master
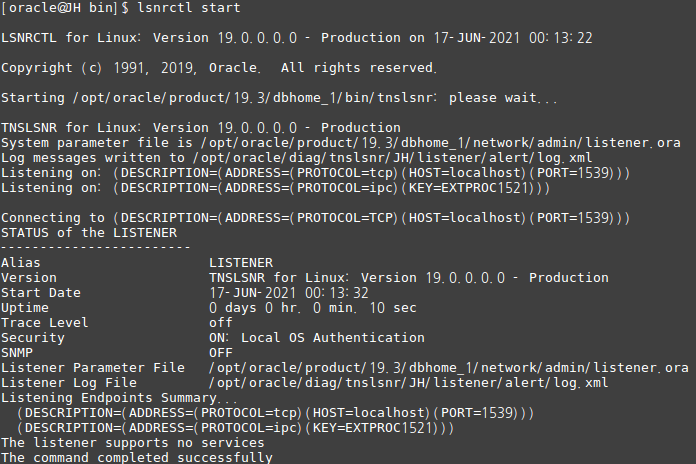
오라클 리스너 실행
루트에서 oracle 계정으로 접속해야만 한다. (oracle database는 oracle이 소유자이기때문에 oracle로 로그인해야합니다.)
[root@JH bin]# su oracle –
[oracle@JH bin]$ pwd
/opt/oracle/product/19.3/dbhome_1/bin
[oracle@JH bin]$ lsnrctl start
[oracle@JH bin]$ lsnrctl stop

# netstat -ntlp
tcp6 0 0 :::1539 :::* LISTEN 3199/tnslsnr <– 오라클 리스너 실행데몬
tcp6 0 0 :::13777 :::* LISTEN 32240/ora_d000_ORCL <– 오라클 인스턴스 실행데몬
정상적으로 오라클리스너, 오라클 인스턴스가 실행되었습니다.
P.S. 설치도중 에러 및 TIP
설치 중에 발생한 에러입니다.
[INS-20802] Oracle Net Configuration Assistant failed.
ifconfig
curl ifconfig.io
두개 동일하면 동일한 IP만 넣고 다르면 두개의 IP 를 넣으셔야 합니다.
# hostname
JH
# vi /etc/hosts
====================
ex)
127.0.0.1 localhost localhost.localdomain localhost4 localhost4.localdomain4 JH
::1 localhost localhost.localdomain localhost6 localhost6.localdomain6
10.101.0.7 JH
123.123.123.123 JH
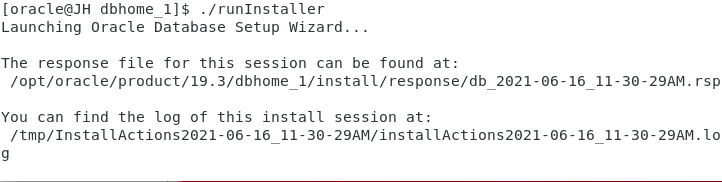
로그로 설치 과정을 볼 수 있습니다.
# tail -f /tmp/InstallActions2021-06-16_11-30-29AM/installActions2021-06-16_11-30-29AM.log
이상입니다.